I'm back with another A Muse Studio Consultant Challenge that Julie Ebersole, Director of Education, has given all us consultants. We were to choose a background stamp and "kiss" it with a solid stamp image. If you are not familiar with this simple yet stunning technique, check out the video Julie made on it. It'll be so much cooler when I can ever figure out how to embed a YouTube video directly into my post!
I used a solid butterfly image and made sure I inked it up with even coverage with Blackberry ink. Then I pressed ("kissed") it evenly against the uninked medium polka background stamp. I think it made such a pretty effect, don't you agree?
I took a purple Koh-I-Nor colored pencil and shaded along the outside of the butterfly wings for added dimension and contrast. Then, I put teeny tiny pink twinkle stickers in the center of the polka dots. Gotta add a little sparkle ya know!
'Just Because' Stamp Set
'Polka Dot Patterns' Stamp Set
For the green floral bouquet, I used an image from a pretty botanical set. I stamped it three times with Grass ink to create a fuller image. Have the stamps that are cling-mounted gives you so much flexibility in manipulating the stem to stay straight or to curve it. I love it! Then, I randomly put tiny Lime Pearl stickers for dimension. I also used a green Koh-I-Nor pencil and shaded the bottom parts near the stems.
'Beautiful Botanicals' Stamp Set
For the sentiment, I also used the same Blackberry ink as the butterfly but I "stamped it off" once on a scrap paper so I would get a lighter shade. I did that so it would give a softer look and wouldn't compete with the butterfly image. To finish the card off, I busted out my shimmery pearlescent chalks and edged along the sides in a blue-green color.
'Wild Rose' Stamp Set
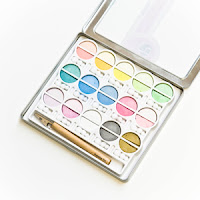
Shimmer Pearlescent Chalk Set
Usually, when I make a card, I pretty much have a layout in mind and can picture how the card will turn out. For this challenge, I only had a picture of the image I wanted to use which was the butterfly with polka dots and the rest just fell into place. I love when that happens!
Thanks so much for stopping by and I hope you have a fabulous weekend!
Card supplies:
(All products used can be ordered directly through my A Muse Studio Web Store)
Stamp sets: Just Because, Polka Dot Patterns, Beautiful Botanicals, Wild Rose
Cardstock: Kraft
Ink: Grass Pigment, Blackberry Pigment
Accessories: Lime Pearl Stickers, Micro Dot Twinkle Stickers (Asst.), Shell Twine, Pebbles, Inc. Shimmer Pearlescent Chalks, Koh-I-Nor Colored Pencils
Tools: A Muse Studio Clear Acrylic Blocks, Scissors


So pretty. Love your kissing! :)
ReplyDeleteoh, what a lovely card! Funny that I used a butterfly with dots too! I love the shading and chalking you added to your card--so pretty!
ReplyDeleteAwesome kissing! ;) And, BTW, LOVE the way you used the botanical Queen Anne's Lace, too!!!
ReplyDeleteGives you the best website address I know there alone you'll find how easy it is. 3D Modelling
ReplyDelete