Pages

Friday, July 30, 2010

July is my favorite month...

because my birthday is this weekend! This card came in the mail for me the other day by my talented crafty sistah Wanda.


Can I just say how cute this card is?!  How can anyone really go wrong with pink, brown, and yummy cake? Look at how the main image is suspended between the pink ribbon?  How clever!


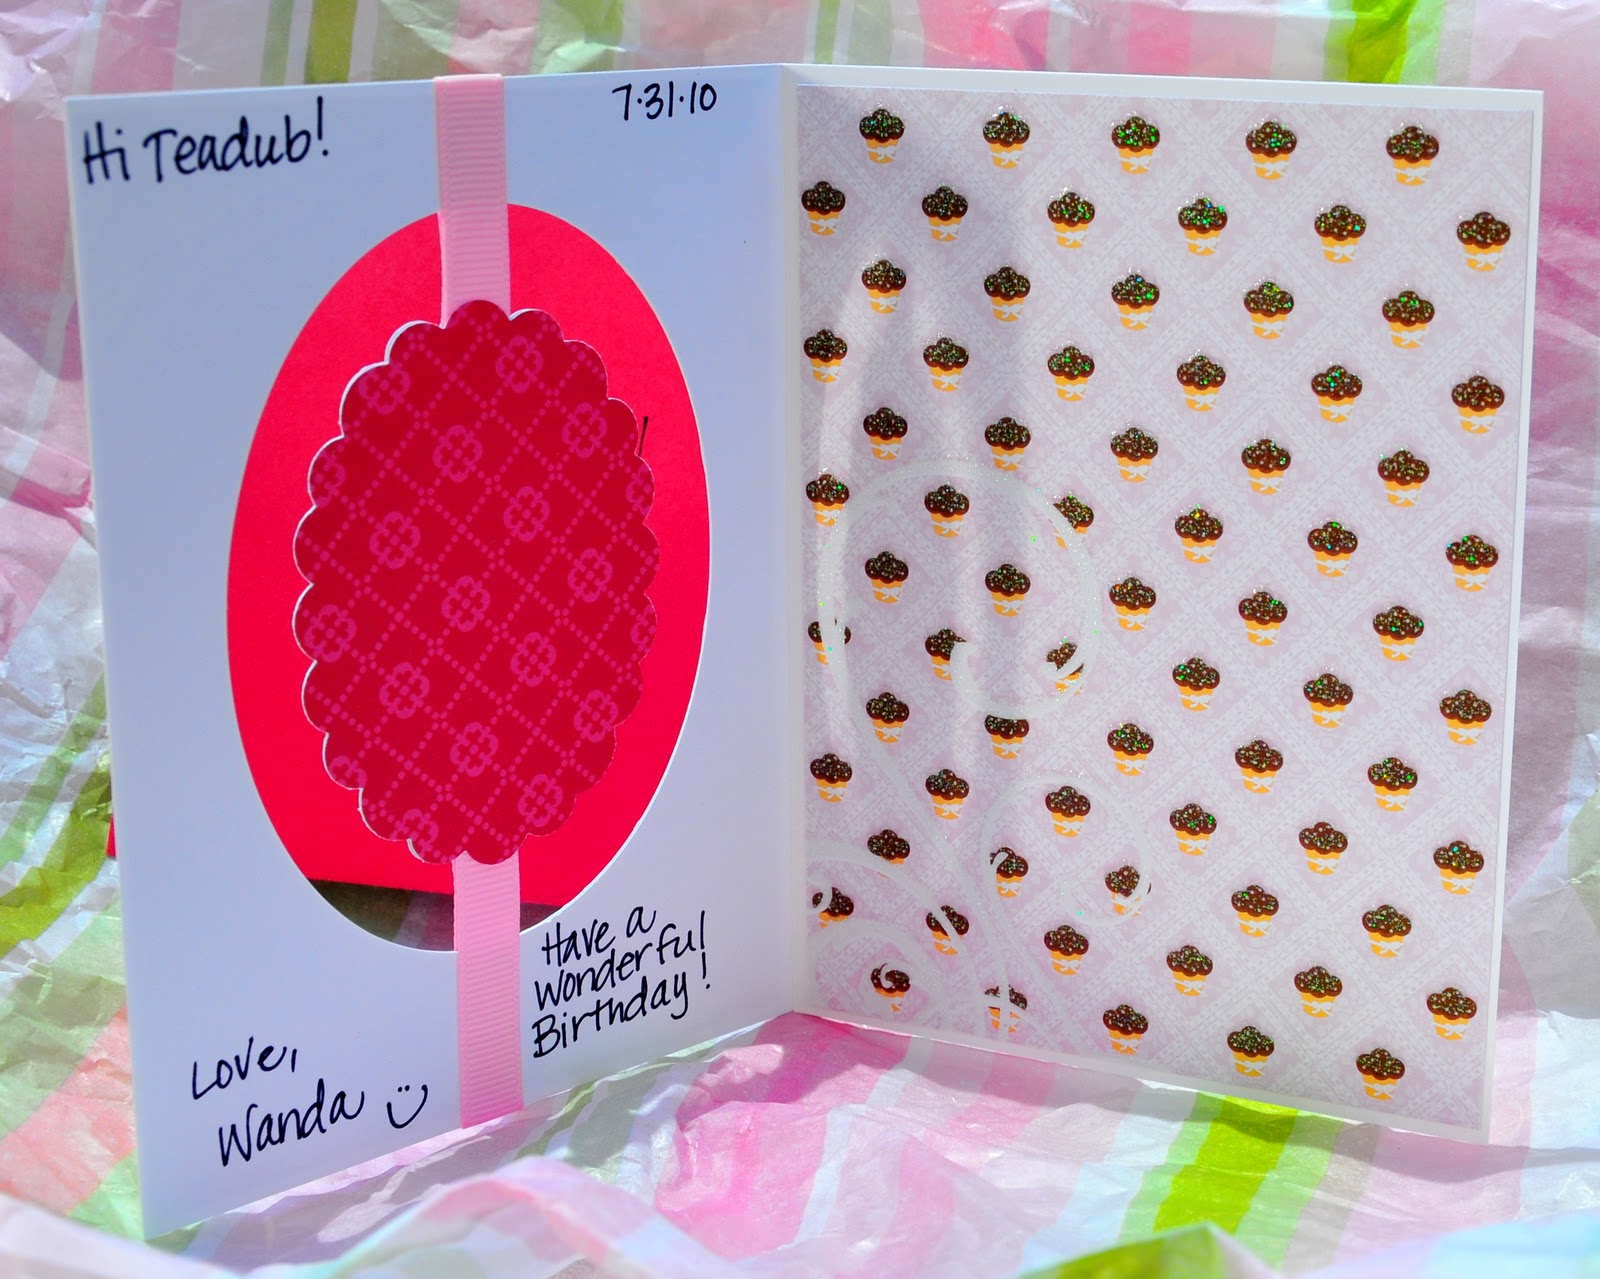
How delicious do those cupcakes look inside?  I can't stand it!

Oh but wait...check out what else came with the cute birthday card...


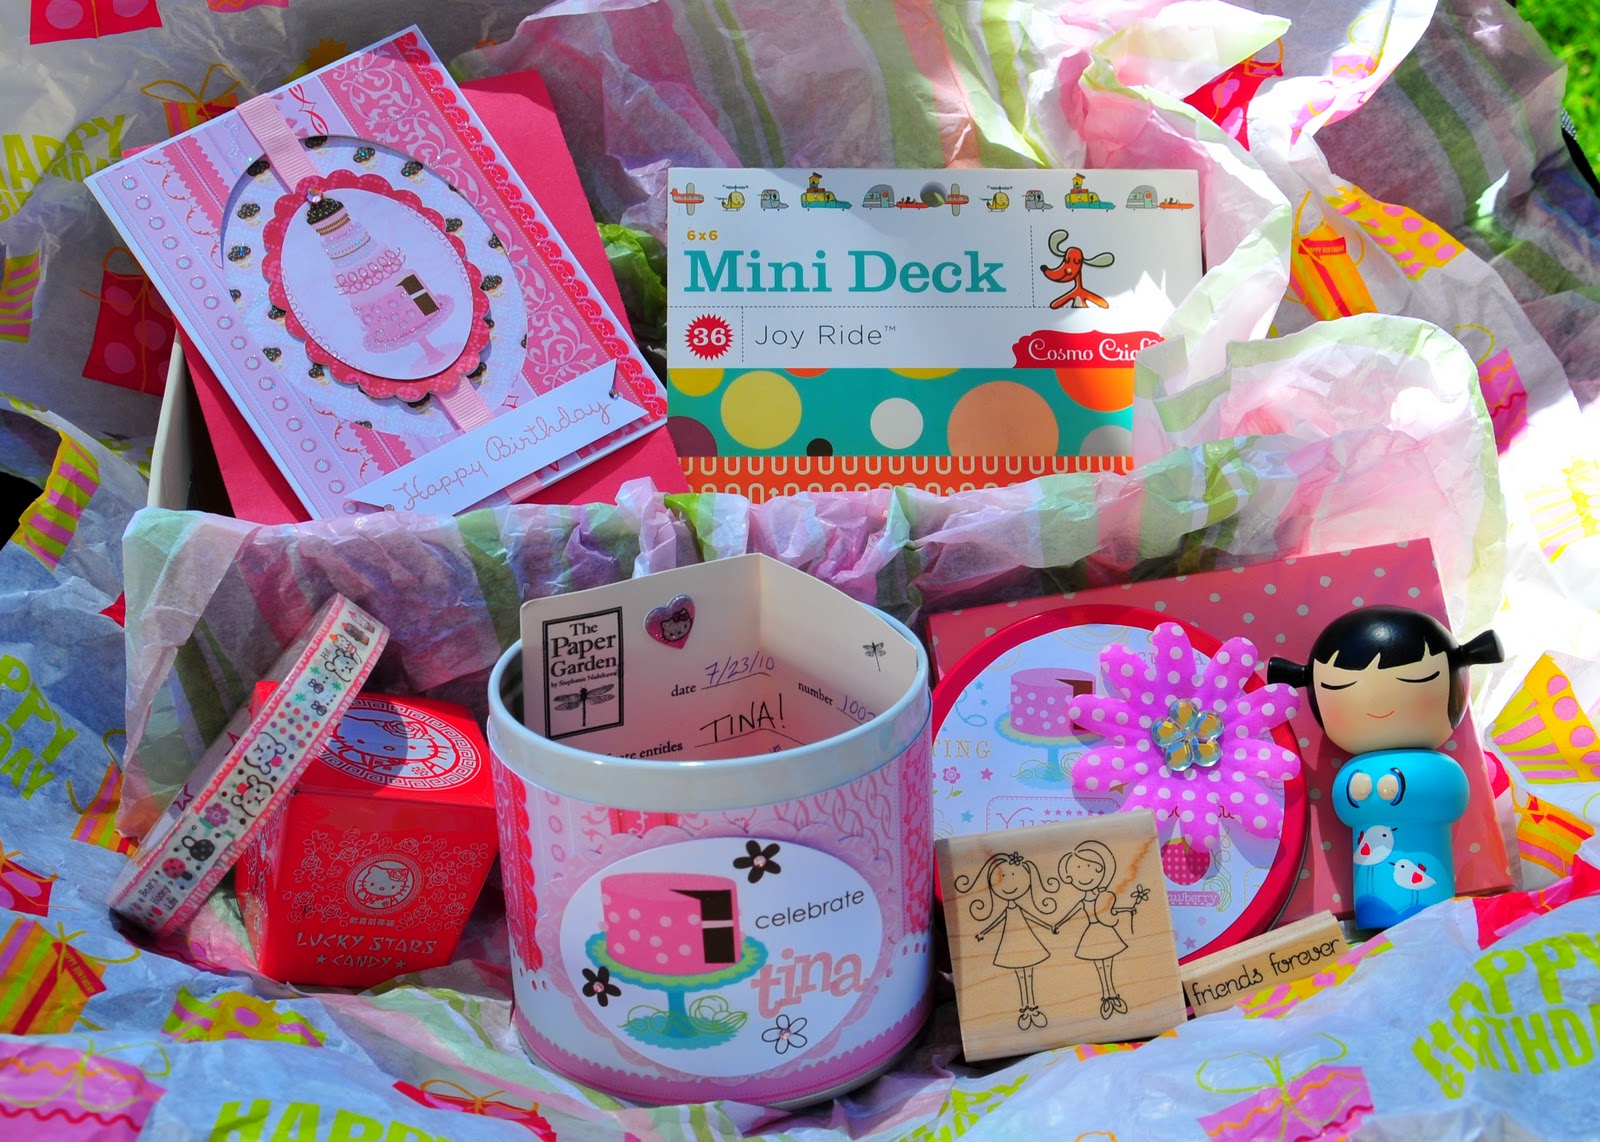
all this crafty goodness! OMG...Wanda spoiled me rotten when this box was sitting on my doorstep! I was like, "WH-aT"?! Seriously, I would have been happy just getting that card in the mail from her but to get all this, I was floored!  To top it all off, I didn't have any of the stuff she sent me!  She's that good!


Here's a close up of the tin Wanda decorated...so adorable!


This is the lid...love the pink flower with bling!


Here's the yummy goodness that was in it!  How adorable are the stamps and that roll of Japanese tape?! I also got a gift certificate to the Paper Garden...I feel a trip to Sacramento coming soon! Hee hee!


Lastly, I leave you with a close up shot of this Momiji doll...it's just the cutest ever!  If you've never heard of them before, you give one of these to someone special and on the bottom of it, there's a hollowed out spot with a strip of paper folded up small and room to write a secret note. This particular one says 'best friends' on the bottom. This little doll is a total inspiration for a future card!

Wanda, thanks so much for the stash of crafty goodness...I love it all! Thanks for making my birthday week so special!

Sunday, July 25, 2010

One-Layer Wednesday 13: Christmas in July

Edit: I swapped out better pics so you can see the glitter on the card. This card also qualifies for the Holidays in July card challenge in the A Muse Lounge. Check that out too!


This is my first time participating in Susan Raihala's weekly card challenge she hosts on her blog, Simplicity. I've been a fan of her creations for the past few years. I was looking at card ideas on the SplitCoastStampers (SCS) website one day and stumbled upon one of Susan's cards that someone CASEd. I was so drawn to her striking clean and simple designs in her card gallery.

July is generally around the time when I start to think about what card designs I want to send for Christmas. Every year, I tell myself to start early on them but that never happens! Usually, I'll be up late cranking them out a few days before Christmas day. We'll see if I can change that this year!

For the card challenge, we are to make a one-layer card, keeping embellishments to a minimum, and a theme of either Christmas, Hanukkah, Kwanza, or winter.


Here's the card I created...it looks better in real life. The design and embellishments I used turned out so much better than I envisioned.  I LOVE when that happens!

I started off with a piece of PTI Kraft cardstock and stamped all the images directly on it using my Stamp-a-ma-jig so nothing would be crooked. This is a very key element when you create one-layered cards because your eye will look directly at the focal point. With simple cards, all you look at is the main image or embellishment so it's very important that everything is properly placed or centered.


I stamped the houses and sentiment using Adirondack Espresso ink (my go-to brown) and my Copic markers. The snow-topped roofs and smoke are colored in with a white Prismacolor pencil. For the puffy line of snow on the ground, I used a white craft pen similar to Liquid Applique, let it dry and heated it up with my heat gun. I outlined the word "cozy" with a red marker for added interest.


I then stamped one scroll on top and one on the bottom with VersaMagic Night Sky chalk ink. I finished off with a red pearl in the centers of each scroll. I also used a Clear Spica glitter pen over the scroll and on the houses for a little sparkle!

Check out Susan's blog Simplicity to see all the other creations for this challenge!

Supplies:
Stamps: Winter Houses, Cozy Christmas MA, Swirly Bracket (A Muse)
Ink: Adirondack Dye Espresso (Ranger), VersaMagic Night Sky (Tsukineko)
Paper: Kraft (Papertrey Ink)
Accessories: Cranberry Pretty Pearls (A Muse), Red Le Pen (Marvy), Dong-A Popcorn Puffy Paint Pen (from Jet Pens), White Prismacolor Pencil (Sanford), Copic markers (.Too Corp), Clear Atyou Spica Glitter pen (.Too Corp), Heat-It Craft Tool (Ranger), Stamp-a-ma-jig (EK Success)

Thursday, July 22, 2010

Butterfly Clear Card

I made use of some supplies I've had in my stash that hardly ever see the light of day when I had this card in mind.


I don't usually make these type of cards too often because clear plastic tends to be very finicky to work with and you have to make sure you use the right kind of ink if you plan to stamp on it. Also, it helps a great deal if you're in a fairly good mood when you decide to make a clear card!

I started by scoring a piece of clear plastic with my Scor-Pal a few times and folding it on the crease.  Then, I stamped the butterfly background using StazOn Ink in Blush Pink.  It's important to keep in mind that the surface of the plastic is slick, so you need to make sure you lift the stamp straight up.  Otherwise, you will smear the image and you won't be very happy about it!

I used a glue pad to stamp the larger butterfly image for the centerpiece and sprinkled Bronze Splendor glitter over the whole butterfly.  Oh so sparkly! I then stamped the "Hello" in New Leaf ink and matted it with pink shimmer cardstock. I also used some foam dots to pop the image up from the card front.

When working with a clear card, any kind of adhesive you use will show up on the back side.  I used a second piece of pink shimmer cardstock the same size as the mat and adhered it directly behind the card front on the inside.  For the inside card base, I used a larger piece of lime green shimmer cardstock to frame the front image when the card is closed.  I used a smaller piece of Poison Ivory shimmer cardstock for room to write a note inside.

Lastly, I tied brown hemp twine around the front of the card a few times to finish off the card.  I love how this card turned out!  I'll have to make more of these cards since it didn't frustrate me too much!

Photo courtesy of Wanda G.

This pretty Marigold card made by my crafty sistah Wanda inspired me to use my square scalloped die from Stampin' Up.  I love the yellow ink on the marigold and the black gingham cardstock she used on the card.  And that sheer yellow ribbon...how cheery is that?! Check out Wanda's blog for more details on this card and to see her other wonderful creations!


My other inspiration also stems from one of the pretty flower cards I made in Julie Ebersole's class during A-Muse-A-Palooza at the Paper Garden in Sacramento.  I love the huge Marigold outline stamped with white StazOn ink on the clear plastic.  It adds so much interest to the whole card!  It almost looks like etched glass!  It's hard to tell but the orange-reddish solid Marigold has glitter in the center.  It's so sparkly in person!

I hope you enjoyed my creation and seeing the other two cards that inspired my Butterfly card!

Thanks for stopping in!
Supplies:
Stamps: Flutterby FlockFlutterbyHello FL (A Muse)


Accessories: Bronze Splendor glitter (Taylored Expressions), The Essential Glue Pad (Tsukineko), Essentials by Ellen Crystal Clear Plastic (Ellen Hutson), Fashion Cord Natural Polished Dark Thin Hemp (Cousin Corp. of America) from Wal-Mart


Tuesday, July 20, 2010

Taylored Expressions Blog Hop!

Thanks for stopping by and welcome to the blog hop hosted by Taylored Expressions! Our mission was to make a card using any TE stamp set released prior to May 2010. I chose to use "Sewing Cuppie" from the Crafty Cuppie set.


I started off attempting to make a card but for some reason the design wasn't coming together as I had envisioned. I'm sure that never happens to anyone else! I decided I would make a sewing notebook for myself since I'm a beginner to that craft. I thought that jotting down all the helpful tips I find on various websites would be a good reference to have in one place. I recently bought a Janome Sew Mini as my first sewing machine.  It's so cute and lightweight!  It's about the size of a 8 1/2 by 11 sheet of cardstock!

I took a piece of Kraft cardstock and made my own background by alternately stamping the sewing basket image from Crafty Expressions and Tiny Heart from A Muse. Then, I adhered it to an 8 x 10 1/2 notebook and put a strip of Enchanted Evening grosgrain ribbon from Papertrey Ink along the side. 


For the centerpiece of the notebook, I used Real Red cardstock from Stampin' Up! for the base and a piece of patterned paper from the Junebug collection by Basic Grey. Love the colors and floral designs! The Enchanted Evening polka dot satin ribbon is by Papertrey Ink.


I adhered Sewing Cuppie on Real Red cardstock to give it a double matted look against the patterned paper.  I used my Copic markers to color my image and a really light blue green Copic for the background image. There was a sheet of patterned paper from the Junebug collection that looked like a quilt design so I paper-pieced it to the fabric that Cuppie was sewing. To make the sparkly frame, I put strips of 1/8" Scor-Tape from Scor-Pal on all four sides and sprinkled TE Bronze Splendor glitter on the tape.  I love how sparkly it turned out! 

I hope you enjoyed checking out my sewing notebook and have fun seeing all the other fabulous creations!

Thursday, July 15, 2010

My Stampin' Fun Weekend!

I had the best weekend in Sacramento with my crafting buddy Wanda when we met up at her local stamp store, The Paper Garden Boutique. I drove two and a half hours early Saturday morning and arrived just in time to take Julie Ebersole's Favorite Florals class she was teaching during A-Muse-A-Palooza. Julie is the Creative Team Director for A Muse Art Stamps (one of my favorite stamp companies).  Her classes are always so much fun to take and loaded with great tips and ideas!

Here I am with Julie, Wanda, and Shauna (Wanda's good friend)


We made five fantastic floral themed cards using stamp images from the Everything's Rosy collection.  My favorite technique was using a strip of five inch sheer ribbon and repeatedly stamping a rose image on it. Julie is explaining to the class what to do with the ribbon.  Look at how pretty the ribbon on the spool is...yum! The card turned out so elegant and simple to make!


I sat at a table stamping away with three other ladies, Wanda, Joy (in the pink shirt), and Shauna. We all had a blast helping each other out and gabbing the morning away!

After Wanda and I finished with the class, we high-tailed it over to Paper Garden a few doors down to do some crazy shopping for...STAMPS!  Really, could there be anything else?!  Well, actually...ink and punches are a neck-to-neck tie for second in my book too.


Another pic of me with Wanda and Stephanie (awesome store owner of Paper Garden) that Stephanie's husband Ken took of us.  He is also a brilliant crafter in his own right.  He's always coming up with fun paper folding projects for the store.  Check out the Paper Garden blog to see his fabulous creations!

I can't believe how fast that weekend went! It came and gone in the blink of an eye! I guess that's what happens when you're havin' fun with your friends...it always flies by!

I'd like to give a shout out to Wanda for sharing her pictures with me for this post.  Check out her blog to see the five cards we made and to read more about our fun stamping weekend!

Happy Stamping!

Wednesday, July 7, 2010

Lovebirds Anniversary Card

I'm experiencing a very busy schedule at home base this week...not much time to be crafty!  Here's a card I made for my sister and her husband.  They recently celebrated their wedding anniversary.


I kept my card clean and simple to make the two cute lovebirds the main focal point.  Aren't they just an adorable pair?  The image is from Kim Hughes's stamp set called "The Birds and the Bees" by Cornish Heritage Farms.  The woodgrain cardstock is from A Muse and I used a Chocolate Spica glitter pen to add sparkle in between the lines. The polka dot Bermuda Bay grosgrain ribbon is retired from Stampin' Up.


I stamped and colored the birds twice with my Copics, cut out the second ones and used foam dots to pop up the image for added dimension.


I made the inside of the card a pop up one for the punched out heart and scalloped heart.  I used a strip of red cardstock and stamped the sentiment on it for a banner look.


Here's a full pic of the inside.  I love the two fish on the bottom left with the sentiment!  Both are by A Muse.

On a side note, I recently found out that Cornish Heritage Farms is going out of business so if you like any of Kim Hughes' stamp sets, now is the time to stock up!  Check out the CHF website and read the story on their blog.  CHF will eventually mark their remaining inventory down before shutting their doors but if you can't wait, Ellen Hutson is liquidating the rest of her CHF stock right now at 40% off in her online store.  I so love all of Kim Hughes' illustrations, I'm sad to see her stamps discontinued so I'm stocking up myself on sets that I've been wanting forever.  Check out her blog for great inspiration!

Well, gotta get back to my chores!  I'll add my supply list later on when I get a chance.  Thanks for looking!

Friday, July 2, 2010

Ka-Pow! Sassy Penguin Card

I wanted to make a card for Barb (one of my good crafty buddies) after we went shopping in Berkeley one weekend. Other than the big box craft stores in our area, we don't live near any good local scrapbook/stamp stores. Sadly, they've all closed down through the years. So we have to trek a little over an hour to find good craft supplies. It's always good to shop at a local scrapbook/stamp store (LSS) if you live near one you love. They need all your support!

I made a resolution this year to use the stuff I buy and not hoard it so much. I'm sure that's a familiar story for some of you!


I tend to get a little overwhelmed sometimes when I make scenic cards.  I think I over do it with stuff.  But in this case, I wanted to use my new goodies and left my comfort zone. It's good to do that every once in a while.

I found a sticker sheet of fuzzy penguins wearing pink bandanas doing martial arts moves from Paper Source (sooo love that store). I cut a strip of the Dear Lizzy 12x12 heart fabric sheet I got from Scrapbook Territory. The whole sheet is adhesive-backed and very easy to work with.  Then, Barb and I stumbled into an eclectic store called Castle in the AirI found some really nice green floral crepe paper I punched out with my Martha Stewart grass border punch. That paper was so much nicer to work with than the streamer-types you find in the party section at the stores.


I've been making more of an effort to make the insides of my cards more decorative and this cloud paper did the trick! I absolutely love, love, love this patterned cardstock from A Muse! You can use it for so many things! The airplane skywriter is also from A Muse. The postal cancel stamp is from Paper Source and I used a mini date stamp from Office Max in the middle.   

The only thing I didn't like on the card was the butterfly trail. Next time, I think I'll use a pencil first before committing to permanent ink.  You live and learn!

Have a super day and thanks for stopping by!

Supplies:
Stamps: Clouds, Sun, Mini Flower, Tiny Daisy, Tiny Heart, Hello, Skywriter (A Muse), Do Something Creative (Paper Source), Mini date stamp (Office Max)
Ink: Memento Tuxedo Black (Tsukineko), Assorted colors of Colorbox Fluid Chalk (Clearsnap), 
Paper: Dear Lizzy Morning Melody Fabric (American Crafts), Clouds, Petite Gingham Yellow (A Muse), Thunder (Bazzill), Pink Lemonade (Elzybells)
Accessories: Green Crepe Paper, Apple Green 1/4" grosgrain ribbon (Schiff), 1/2" Round-It-All (Zutter), Martha Stewart Grass Border Punch (EK Success), Butterfly Square Punch (Punch Bunch), Small and Large Oval Punches (Stampin' Up!), Olive and Pink Atyou Spica Glitter Pen, Copic Multiliner, Assorted Copic Markers (.Too Corp), Paper Cutter (Fiskars)

Thursday, July 1, 2010

Taylored Expressions Sketch Challenge #118


Every week, Taylor Van Bruggen of Taylored Expressions posts a sketch challenge for anyone that wants to take part. I am proud to post my very first sketch just in the nick of time! Hop on over to Taylor's blog and check out all the entries. Tomorrow's the last day to enter.


I soo love this Crafter Cuppie set...if you're a crafter, you have to get it!  It has five images of Cuppie stamping, scrapping, sewing, knitting, and painting along with sentiments.  There's also an additional coordinating set called Crafty Expressions with other images and sentiments.

I used Bazzill Dotted Swiss in Pirouette as the 5 1/2" square card base and as one of the scalloped borders.  The patterned paper is from Basic Grey's Nook and Pantry collection. The solid cardstocks are Shimmer Couture from A Muse.

I used my Copic markers to color in the main image.  Cuppie's apron is paper pieced from the BG Nook and Pantry.  For the jar of glitter, I used the Sakura Glue pen (miracle product) first to make dots inside the jar and sprinkled it with Taylor's glitter in Waterfall.  Oh so sparkly...I love how shimmery her glitters are!

The postal cancel stamp image is from Paper Source, stamped in Brilliance Pearlescent Chocolate pigment ink, and embossed with clear powder over the ink to give it a raised texture. It's hard to tell in the picture but it's there.


Here's the inside of the card.  I stamped one of the sentiments from Crafty Expressions in Adirondack Espresso along with the ink pad image in Colorbox Fluid Chalk Berrylicious.

I'm really happy with how my card turned out!  Thanks for the challenge Taylor! 

LinkWithin

Related Posts with Thumbnails